
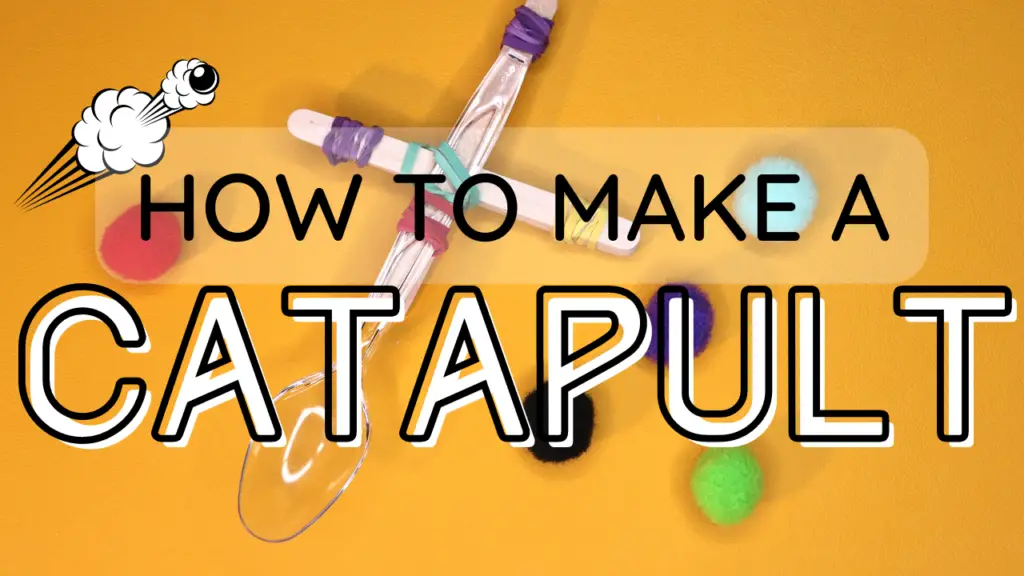
Catapults are not only a great teaching tool to learn about engineering and physics but are incredibly simple to build using a few household items.
Building a catapult is an exciting physics experiment that not only explains the science behind catapults but shows your child how force on an object works. This experiment gives a visual to how the see-saw on the playground works, launching planes from aircraft carriers, and using slingshots.
Since the science and engineering of catapults are still used today, this is a great experiment to do at home and find examples of it in everyday life.
How to make the Catapults experiment
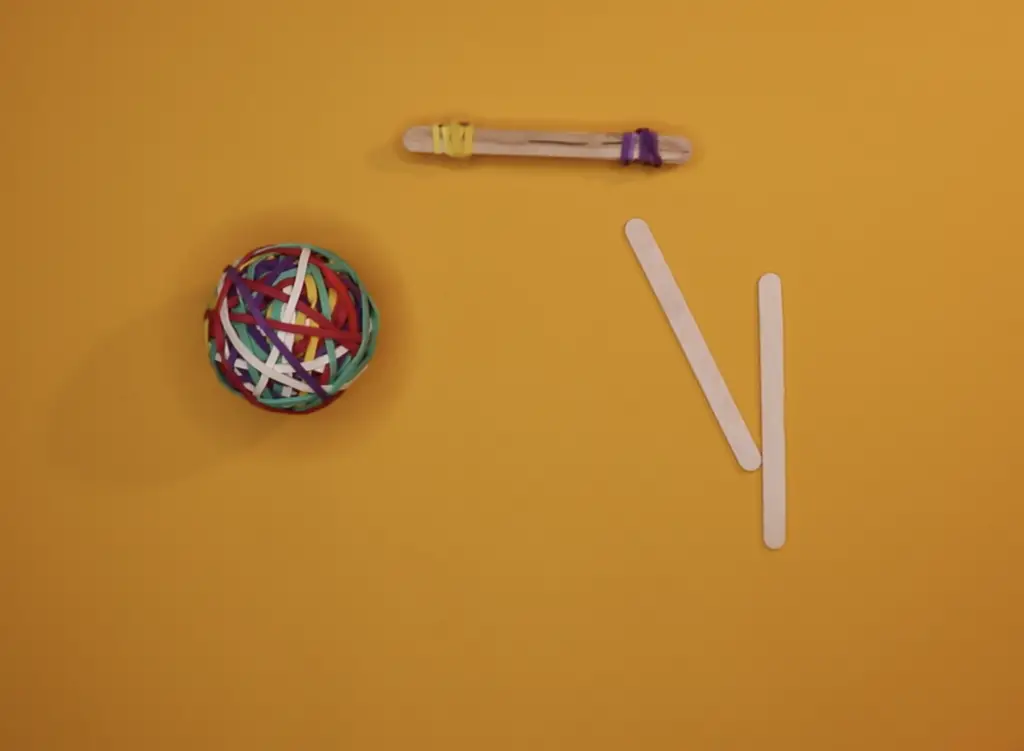
Supplies you will need
For the catapult experiment, you’ll need:
- Craft sticks
 (we used 7)
 - Rubber bands
- A plastic spoon
- Something to launch (we used pom-poms)
- Scissors

Before you start
This experiment does use sharp scissors, so please watch your child carefully while going through these steps.
Instructions
Here is how to do the Catapults experiment with your toddler:
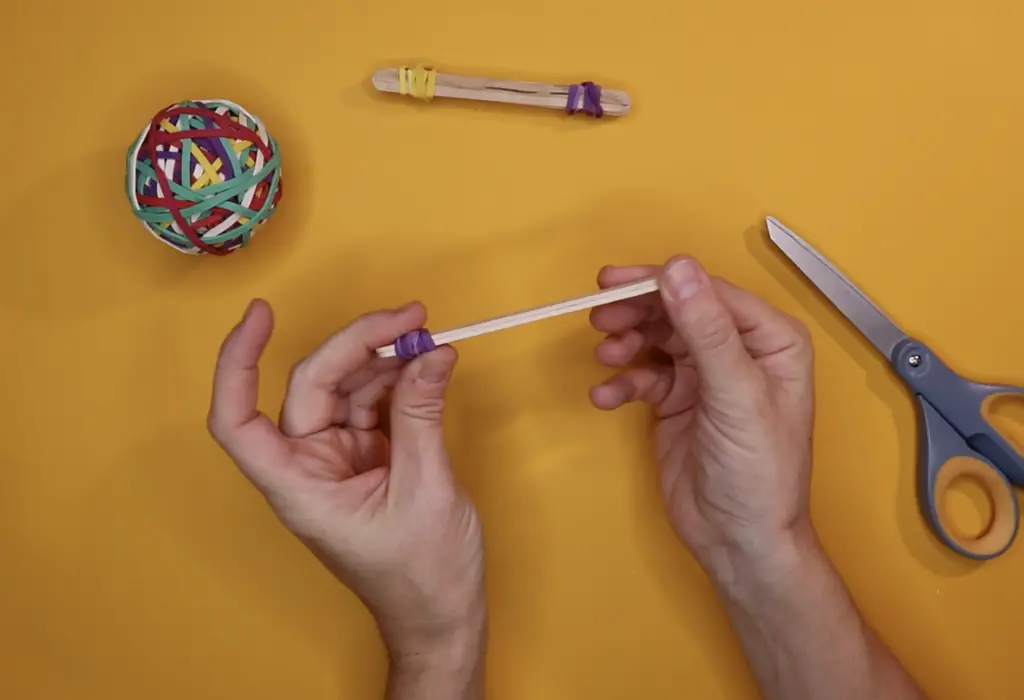
Step 1: Create the fulcrum
In this step, you are creating the fulcrum, which is the pivot point of the catapult.
Stack 5 craft sticks on top of each other and then tie a rubber band around each end. Place it on the side as you move on to step 2.
Get your preschooler involved: Have your child hold together the craft sticks while you use a rubber band to tie them together. Or, if your child can tie the rubber bands themselves (even a few times!), it’s a fantastic fine motor skill activity.
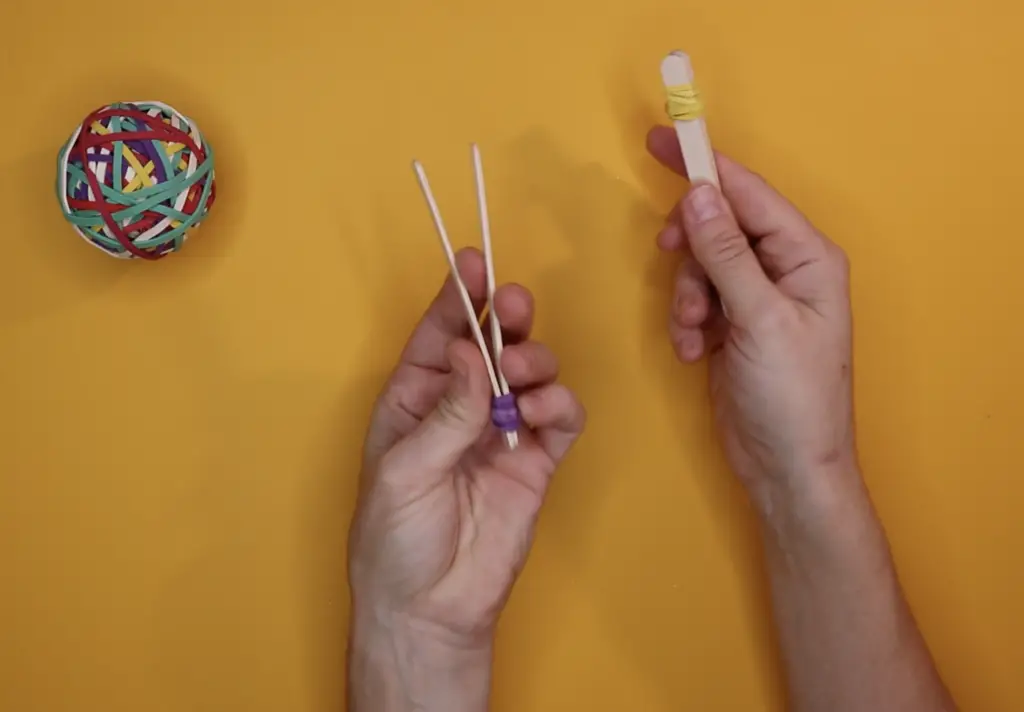
Step 2: Cut notches in the beam

IMPORTANT: do not allow your child to take part in this step because it is necessary to use sharp scissors.
Using a pair of sharp scissors, cut small notches on one end of 2 craft sticks. These notches just have to be deep enough for the rubber band to have something to grab onto.
Step 3: Tie a rubber band around notches
In this step, you are creating the beam (or lever) of the catapult. This is where you’ll launch objects from!
Line up the 2 craft sticks, notch ends together, and tie a rubber band around the notches.
Get your preschooler involved: Same goes for this step – your child can try to tie the rubber band around the notches, even if it is just a few twists around the sticks.
Step 4: Insert fulcrum between beam sticks
Carefully separate the 2 craft sticks of the beam with your fingers and insert the fulcrum between the sticks.
I left my fulcrum loose between the beam sticks so we could easily move the fulcrum up and down. It does make it slightly more difficult to handle for launch.
If you would rather make launching easier, simply tie a rubber band around the fulcrum and beam to secure it in one spot. You could always apply some force to slide the fulcrum!
Step 5: Attach spoon to the beam
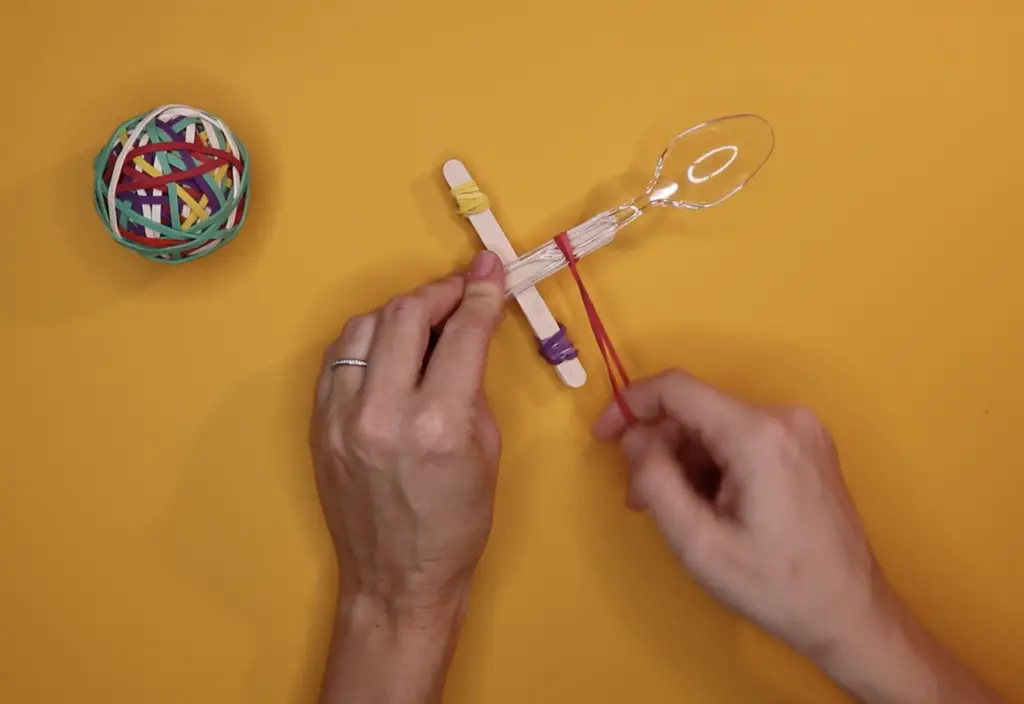
The spoon is where you will launch objects from.
Place the spoon on top of the beam and secure it with a rubber band.
Step 6: Ready for launch!
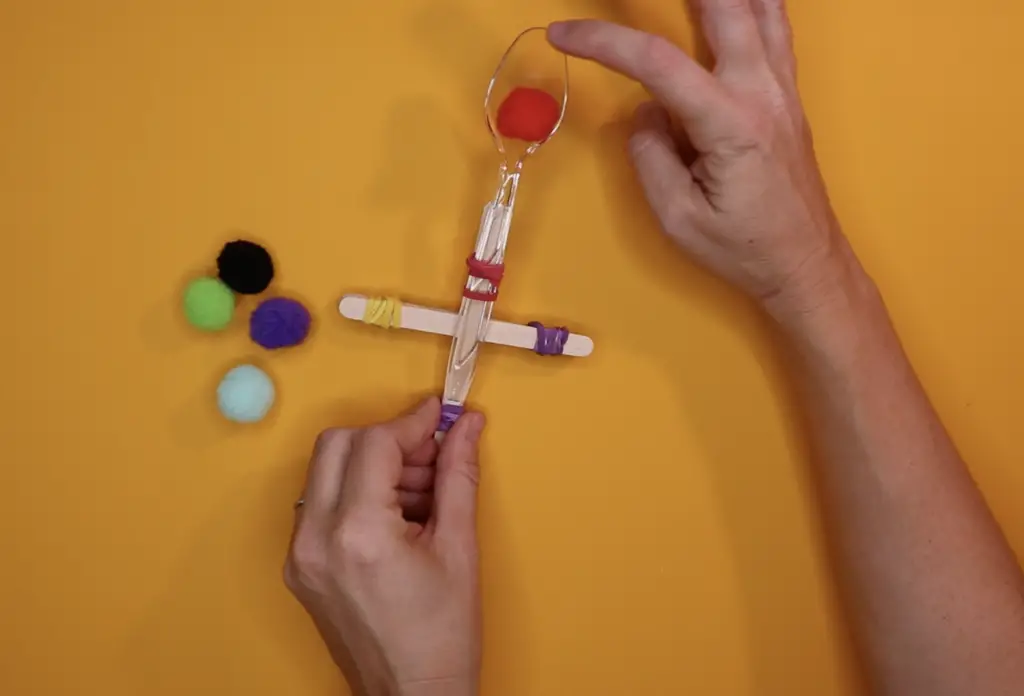
Add the object you want to launch to the spoon and you are GO for launch!
Experiment by changing the pivot point (move the fulcrum up and down the beam) to see how that affects the launch height.
Get your preschooler involved: this is the best step to have your child involved!
Try experimenting
We decided to test out how to change where our object flew by creating a target and trying to hit the bullseye. We experimented by changing the position of the fulcrum, where to point the catapult, and how much force we applied.
If you would like to create your own target, you only need a few simple items:
- White trash bag
- Permanent marker
- Tape
We simply taped the trash bag to the wall and started shooting!
The science behind the Catapults science experiment
A catapult is a fun and exciting way to talk about physics with your child and explain what potential and kinetic energy is. My 3-year-old still talks about the difference between potential and kinetic energy with me after this experiment!
How a catapult works
A catapult is a lever or beam that is built on a fulcrum. A fulcrum is a pivot point for the catapult and determines, along with how much force you add, how far the object we are launching will fly.
Potential energy is energy that is stored as a result of its position. Some examples are pulling back on a wind-up car before releasing or a wrecking ball pulled back. When we apply force on the catapult to gear up for launch, we are building our potential energy.
Kinetic energy is the energy an object has because of its motion. After applying force on the catapult and letting go, our object takes flight. It is using kinetic energy as a result.
More physics experiments to try out with your child
- Paper airplanes – build 3 different paper airplanes and see which flies the farthest (and why!)
- Sink or Float – what is density and how do you know when something is more or less dense than the liquid it’s in?
FAQ about the Catapults Science Experiment
What makes a catapult go further?
If you want your object to fly further, you have to build more potential energy. To build more potential energy, you have to change the location of the fulcrum further away from the launch point (the spoon).
What factors could affect a catapult?
For this catapult, there are a few factors that could affect the launch:
- Where you place the fulcrum – the further away from the launch point, the higher the object will fly
- How much force you add to the spoon – the more force, the higher the object will fly
- How many craft sticks you add to the fulcrum – the more sticks, the more force you can add (but too many can break your catapult!)
Recent Posts
Have you always wondered how a rocket launches into space? There's a lot that goes into it, but today's experiment helps kids to visualize rocket launches. This experiment demonstrates a rocket...
If you take the time to look, you'll find a surprising amount of symmetry when you step outside. Symmetry in nature is all around us! This experiment takes kids on an excursion to find symmetry in...